
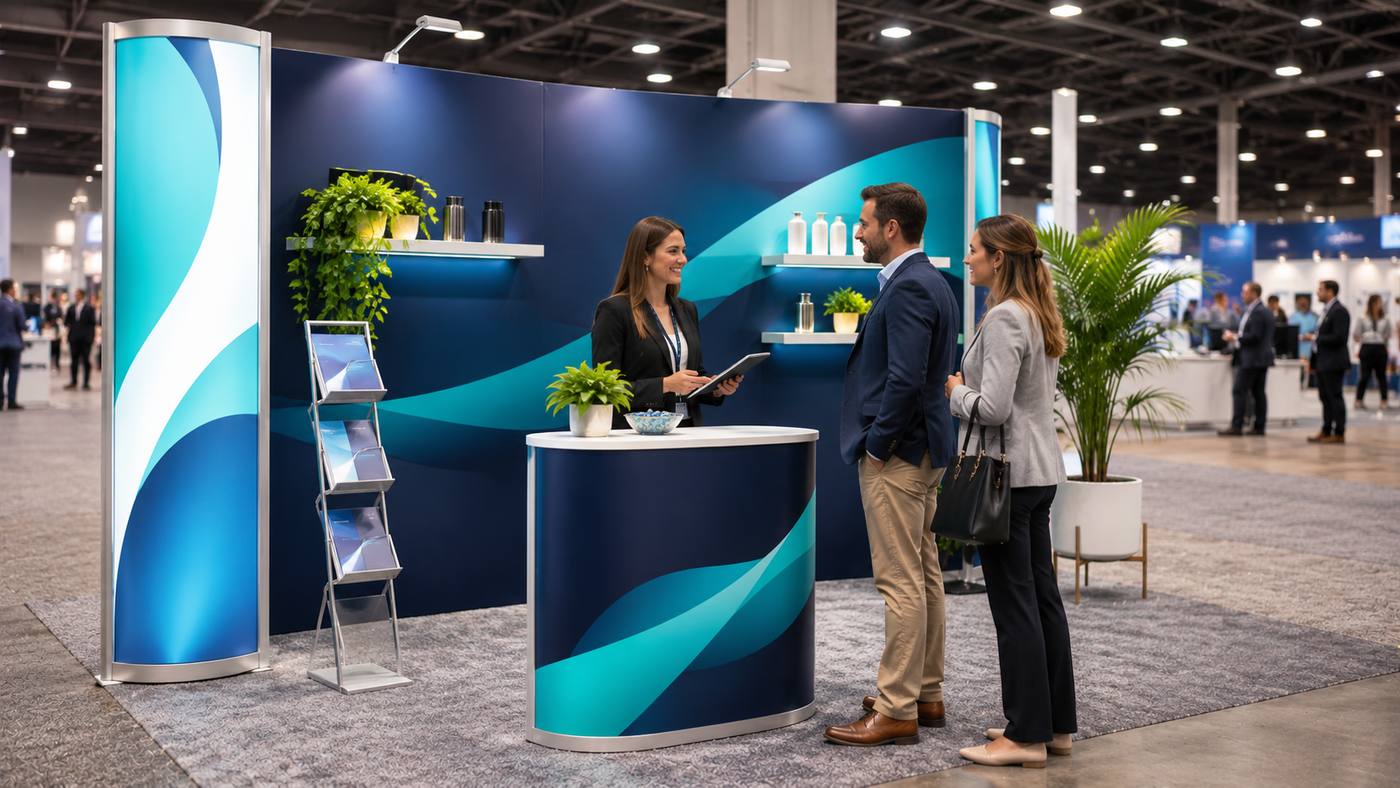
An exhibition booth has only a short moment to capture attention. Visitors are surrounded by competing signs, demonstrations, product displays, and conversations, so a successful setup must communicate clearly while giving people a reason to stop. Expoprint.io is an online supplier of customizable trade show booths, printed canopy tents, event graphics, and display accessories. Its website combines ready-to-configure products with a browser-based 3D design studio, professional design assistance, and print-production services for customers in the United States.
Buying a booth is not just a matter of choosing a colorful background. The right purchase depends on the event’s footprint, exhibitor regulations, travel logistics, product presentation, graphic quality, and delivery schedule. A company attending one local fair has different needs from a brand transporting the same display to multiple national conventions. An attractive structure also needs to be safe, simple enough for the available crew to assemble, and reusable where repeat attendance is planned.
This guide explores the products offered by ExpoPrint, the differences between its main booth systems, and 11 practical design and buying tips. It also explains how to prepare artwork, compare total costs, review proof approvals, and plan delivery without confusing advertised production turnaround with guaranteed arrival. Company-specific product and policy details are based on its published website; buyers should verify current prices, lead times, and specifications before ordering.
What Is Expoprint.io?
Expoprint.io is the website of ExpoPrint, a business supplying large-format printed displays and branded event equipment. The company’s official catalog includes custom canopy tents, portable trade show booth systems, backdrops, advertising flags, printed table covers, replacement parts, counters, and display stands. Its service pages describe design assistance, a proprietary 3D layout tool, optional expedited production, and customer support.
The website lists a California headquarters and explains that production may be routed through a network of facilities in the United States and elsewhere. It advertises more than 15 years of online printing experience, which is a company statement rather than an independently confirmed measure of the site’s operating history. Its frequently asked questions currently say orders ship to the contiguous United States, not internationally.
Who Can Use ExpoPrint’s Services?
The products can suit small retailers, trade show exhibitors, nonprofit organizations, food vendors, recruiting teams, marketing agencies, and companies introducing new products. A local business might need a single printed canopy, while a technology company could use a fabric backdrop, illuminated display, counter, and media stand within one coordinated exhibition space.
Is It a Printing Company or a Booth Design Service?
It provides both printed products and ways to design them. Customers can assemble a visual layout in the online studio, submit prepared artwork, or ask the design team for help. However, an online mockup is not the same thing as venue-approved architectural plans, electrical services, labor arrangements, or on-site exhibit installation. Those responsibilities may require separate coordination with show organizers and contractors.
What Can You Buy From Expoprint.io?
The main categories are booth systems, tents, and accessories. Selecting the right category before working on graphics can save considerable redesign time.
| Product category | Typical purpose | Buying consideration |
|---|---|---|
| Custom canopy tents | Outdoor markets, brand activations, vendor booths | Footprint, frame, fabric, anchoring, and weather limits |
| QuickPop pop-up displays | Portable indoor backdrops | Case dimensions, setup team, and visible graphics area |
| TensionMax fabric displays | Smooth fabric backdrops and booth kits | Graphic tension, frame layout, and accessories |
| PanelFusion modular booths | Display structures with optional media integration | Panel configurations, shelves, and TV compatibility |
| LumiSEG and LumiCube displays | Backlit exhibit graphics | Electrical access, lighting specifications, and venue approval |
| TableTop displays | Smaller table-based presentations | Available table area and backdrop stability |
| Flags and step-and-repeat backdrops | Wayfinding, promotion, and photography | Sight lines, fabric finish, and positioning |
| Booth accessories | Counters, podiums, stands, and replacement graphics | System compatibility and transport needs |
QuickPop: Compact, Repeatable Setup
Expoprint.io describes its QuickPop system as a collapsible pop-up format with graphics that stay attached for easier repeated setup. It can be appropriate for event teams that travel frequently and value compact transport. Before buying, check the specific product’s packed dimensions, included case, assembly instructions, and whether side returns or endcaps are part of the selected package.
TensionMax: A Smooth Fabric Presentation
TensionMax uses tensioned fabric graphics over a frame. It is designed for a clean, continuous backdrop and can be combined with other exhibit components. A fabric wall is not automatically crease-free under all handling conditions, so correct installation, storage, and care remain important. Confirm whether the design prints on one or both sides and how the fabric attaches.
PanelFusion: A Modular Display Layout
Expoprint.io’s PanelFusion collection emphasizes configurable panels and options such as TV mounts and shelving. This may appeal to exhibitors presenting products, videos, or demonstrations. For heavy displays and electronics, confirm manufacturer load ratings, cable routing, and show-site installation rules rather than assuming any screen will fit a listed mount.
LumiSEG and LumiCube: Illuminated Booth Graphics
Backlit panels can help an exhibit stand out in a large hall, but they require electricity and safe cable management. The website identifies LumiSEG as an LED lightbox family and LumiCube as connectable illuminated display components. Ask about voltage, power demand, cases, replacement fabric, assembly, and authorized electrical service at the venue.
11 Brilliant Tips for Building an Effective Trade Show Booth
1. Begin With the Event’s Rules and Your Actual Space
Before ordering through Expoprint.io, obtain the exhibitor service manual and confirmed booth dimensions. A 10-foot display can still conflict with venue height limits, line-of-sight rules, fire restrictions, or neighboring exhibitor boundaries. Determine whether your space is an inline, corner, peninsula, or island booth and note where people will approach. Never assume an online product labeled 10ft is automatically approved for every 10-by-10 exhibition space.
The manual may also specify approved materials, access windows, labor requirements, and how freight must be delivered. Confirm these constraints before graphic design, not after the display has shipped.
2. Choose a Display System Around Your Team
A sophisticated exhibit can become expensive if your staff cannot transport or assemble it. Consider who will unload the cases, how many people are available, whether tools are permitted, and how often the booth will be reused. ExpoPrint markets QuickPop for convenience, TensionMax for fabric presentation, and PanelFusion for modular display options. These are useful starting distinctions, but the final choice should follow the exact system’s instructions and packed weights.
For a small team flying to several events, cases and assembly simplicity might matter more than maximum backdrop height. For a single major convention with hired installation support, a larger configuration may be reasonable.
3. Make the Main Message Readable From the Aisle
Attendees should understand what the company offers before they step into the booth. Use one clear headline, a recognizable visual, and a short supporting message. Avoid filling every available fabric surface with paragraphs, tiny contact information, and multiple competing calls to action. When designing with Expoprint.io, use the 3D view to inspect where text and visual elements land on each panel.
A simple message also works better across different event layouts. Product details can live on a nearby counter display, touchscreen, brochure, or conversation rather than competing with the primary wall graphic.
4. Match Booth Dimensions to Visitor Movement
A backdrop, counter, and screen may fit on a floor plan yet create a cramped entrance. Leave practical room for attendees to approach, view products, and talk to staff without blocking the aisle. Check door swings, chair positions, screen visibility, and access to any required utilities. In a small booth, a compact counter and one purposeful demonstration zone may be more effective than several separate furniture pieces.
For larger footprints, use distinct areas for greeting, product exploration, and longer conversations. Keep sight lines open so a visitor can understand where to begin.
5. Treat the Graphic Proof as a Critical Checkpoint
Expoprint.io says customers can review a PDF print proof before production. That step deserves careful attention. Check spelling, trademarks you own or have permission to use, logo proportions, contact details, panel orientation, safe areas, image sharpness, and the relationship between adjacent sections. A digital 3D preview helps visualize layout, but the proof should also be reviewed for print-specific details.
A Proof Is Not a Physical Color Sample
Screen color and final printed fabric can differ because of lighting, material, and printing processes. For color-critical projects, ask what color-management support or samples are available. Do not assume that the appearance of a monitor is a guaranteed match to the finished fabric.
6. Use the 3D Design Tool to Test Complete Arrangements
One notable feature of Expoprint.io is its browser-based design studio, which the business says can combine products and accessories into a visual exhibition arrangement. Try a few practical configurations before committing: backdrop only, backdrop plus counter, and a layout with a media stand or lighting. Compare how much floor space each option occupies and whether the main message remains visible from likely visitor approaches.
A mockup is especially valuable when different people are choosing the design, such as a marketing manager, sales lead, and event coordinator. It provides a common visual reference before anyone approves final artwork.
7. Select Tent Sizes for Real Outdoor Workflows
Expoprint.io lists printed canopy sizes including 5-by-5, 10-by-10, 10-by-15, and 10-by-20 feet. A compact setup can suit limited vendor space; a larger model may provide more room for display tables and visitors. Check the actual frame footprint and the fabric’s compatibility with the frame, particularly if you are replacing an existing top. ExpoPrint’s own sizing guide notes that nominal canopy size and the measurements of the cover are not necessarily identical.
Outdoor use also requires approved anchoring, weather monitoring, and compliance with the event organizer’s tent and fire rules. A fabric described as weather-resistant is not a promise that it is safe in high winds or severe conditions.
8. Choose Accessories That Support a Specific Goal
Flags, printed table covers, counters, podiums, lighting, literature stands, and replacement graphics can improve an exhibit when each has a purpose. A tall flag may help visitors locate an outdoor tent, while a printed table cover can make a simple market booth feel consistent. A display counter can organize samples, and a media stand can support a product demonstration when appropriately rated.
Avoid adding accessories just to make the exhibit look busy. Every piece adds cost, setup time, packing volume, and potential restrictions. A coordinated, uncluttered booth is easier to navigate and can look more professional than an overcrowded one.
9. Budget for the Entire Event, Not Only Printing
A product price shown on Expoprint.io is only one part of the total exhibition budget. Include shipping, taxes, optional graphics or accessories, travel, flooring, venue electricity, material handling, storage, labor, and damage contingency where applicable. Some venues require purchases from designated suppliers for electricity or freight services.
Compare a system’s cost over multiple uses. A more durable reusable display may make sense for a regular event schedule; a modest, compact kit may be more appropriate for a first-time exhibitor. Avoid claiming a particular system will produce guaranteed leads or sales—the outcome depends on the event and how the booth is staffed.
10. Work Backward From the Delivery Deadline
Expoprint.io lists production tiers such as one-business-day super rush, three-business-day rush, and seven-business-day regular production for applicable booth products. These are production windows, not door-to-door shipping guarantees. Its FAQ also gives an estimated order-receipt range of five to fifteen business days depending on order configuration and destination.
Production Time and Transit Time Are Different
The schedule should include artwork preparation, proof approval, manufacturing, carrier transit, possible delivery exceptions, and time to inspect the finished goods before traveling. A one-day production option does not mean the display will arrive the next day. Check the selected product’s current configuration, shipping option, and confirmed dates before you rely on a deadline.
11. Plan for Reuse, Maintenance, and Replacement Graphics
Think beyond the first event. Ask whether printed fabric can be replaced without buying another frame, how to inspect connectors and cases, and what happens if a graphic is damaged. Expoprint.io says many products allow customers to order graphics without the original hardware. That could be useful when refreshing a campaign or updating a logo, but compatibility must be confirmed by exact product and frame version.
Store clean fabric dry, follow system-specific folding guidance, and inventory components after each event. A simple packing checklist helps prevent the loss of connectors, feet, fabric sleeves, and lighting accessories.
How the ExpoPrint Ordering Process Works
The company’s published process centers on configuring a product, preparing its graphics, approving a proof, and receiving the finished display. The steps below provide a useful planning sequence, not a claim that every order has identical options.
Step 1: Select a Product and Footprint
Start with the exhibition space and event goal. Review whether a booth system, custom canopy, or smaller display best fits the activity. Check the exact product listing for dimensions, included hardware, carrying case, and eligible accessories.
Step 2: Build the Layout or Request Design Help
The site advertises a 3D design studio, free design assistance, and the option to upload prepared print artwork. If an agency or designer is handling the project, use the manufacturer’s templates for the chosen system and clarify who will make revisions.
Step 3: Confirm Materials and Accessories
A booth package may include frames and a case, while some items can be purchased as graphics-only replacements. Verify all included components before assuming a podium, media mount, lighting kit, or tent wall is part of the quoted base product.
Step 4: Review the PDF Proof
Proof approval is an important checkpoint for text, position, artwork, and panel continuity. Keep a copy of the approved version. Ensure decision-makers know who has authority to approve it, particularly if multiple departments are involved.
Step 5: Select Turnaround and Shipping
Confirm which production tier is available for the exact product. Provide the correct destination and verify whether delivery goes to a business, hotel, residence, or exhibit warehouse. Allow extra time to inspect the shipment before event setup.
Step 6: Inspect and Rehearse the Setup
Check the number of cases and components when the shipment arrives. Photograph damage before disposing of packaging and follow the published support process when necessary. If time allows, rehearse assembly before the show so the team knows the sequence and can identify missing parts early.
Trade Show Booth System Comparison: What Should You Choose?
The following comparison focuses on the systems described in the official ExpoPrint catalog. Exact configurations, prices, and sizes vary.
| System | Primary strength | Potential trade-off | Suitable use |
|---|---|---|---|
| QuickPop | Collapsible design and travel convenience | Less configurable than some modular arrangements | Frequent short events |
| TensionMax | Clean tension-fabric presentation | Requires correct fabric fit and frame assembly | Marketing displays and backdrops |
| PanelFusion | Modular merchandising and media options | More components to transport and organize | Product-focused booths |
| LumiSEG | Illuminated SEG-style graphic presentation | Requires power and event electrical planning | Premium visual presentation |
| LumiCube | Connectable illuminated display elements | Lighting, storage, and power coordination | Flexible branded exhibits |
| TableTop | Compact display surface | Limited viewing area and footprint | Small events and tabletop presentations |
Is a Backlit Booth Worth It?
Backlighting can emphasize color and help a message stand out in some environments. Its value depends on venue lighting, power access, audience, and the event’s marketing goals. Before committing to an illuminated system, compare the total cost of lighting, electricity, setup, and transport with a conventional fabric booth.
When Is a Canopy Better Than a Wall Display?
A tent can provide a recognizable branded structure for outdoor markets, fairs, and mobile promotions. An indoor convention may restrict canopies because of fire codes, footprint, or ceiling clearance. Use a display appropriate to the venue rather than treating every printed product as interchangeable.
What Does Expoprint.io Cost?
Pricing differs by booth size, structure, fabric, printing, accessories, and production choices. Expoprint.io’s published catalog organizes booths into price bands below $500, $500–$1,000, $1,000–$2,000, and above $2,000. Its product pages advertise starting prices for individual configurations, such as a 10-by-10 custom canopy tent listed from $595 and certain compact QuickPop displays in lower price bands. These are website listings observed during research, not fixed quotes or promises of final checkout pricing.
Compare Like-for-Like Quotes
A backdrop-only product cannot be compared directly with a kit containing a counter, lighting, media stand, and printed side panels. Ask for a complete list of inclusions and whether hardware, shipping, design services, taxes, and rush production appear separately.
A Simple Event Budget Example
Suppose an exhibitor budgets $1,200 for display materials, $350 for logistics, $250 for show-site utilities, and $200 for incidental setup costs. The illustrative total is $2,000 before booth rental, staff travel, and accommodation. These figures are examples, not prices quoted by ExpoPrint. The exercise shows why event budgeting should extend beyond the item in the shopping cart.
Cost per Event Can Matter More Than Purchase Price
If a reusable booth costs $1,000 and is used at five events, the equipment purchase averages $200 per event before handling, storage, graphic replacement, and other costs. A cheaper display bought repeatedly may cost more across the same schedule. Use actual forecasts instead of assuming that durability or return on investment is guaranteed.
Artwork and Print Preparation for Custom Event Displays
Large graphics demand attention to design and production requirements. A logo that looks sharp on a laptop may become visibly pixelated when stretched across a wide fabric wall.
Confirm Templates and Print-Safe Areas
Use the specific product template supplied for the chosen model. Keep critical text away from seams, folds, panel joins, and edges where fabric wraps around a frame. Check the direction of artwork on each surface, especially for a tent canopy with multiple valances and walls.
Use Suitable Source Files
Vector artwork is useful for logos and typography because it can scale without the same pixelation concerns as a low-resolution raster image. Photos need sufficient resolution at final output size according to the printer’s specifications. Do not rely on an arbitrary universal DPI value; ask the production team about acceptable formats, color handling, bleed, and minimum effective resolution.
Make the Message Work at a Distance
An exhibit wall should be understandable without visitors standing inches away. Use strong contrast and a clear visual hierarchy. Consider how the counter or staff might obscure the lower part of the backdrop. Test the design from a visitor’s perspective in the 3D mockup and at realistic viewing size.
Review Every Branded Component Together
When ordering through Expoprint.io, match colors, typography, and message across the backdrop, flags, canopy, table cover, and printed counter. Consistent branding helps the setup feel intentional. A unified presentation is often more effective than a collection of unrelated high-impact graphics.
Shipping, Returns, and Production Policies to Understand
Expoprint.io’s current FAQ states that shipments are limited to the contiguous United States. Its website lists multiple production speeds, but those represent manufacturing time plus separate shipping transit. For deadline-sensitive exhibits, ask customer service for the current availability and confirm the selected destination before payment.
Custom Printing Changes the Return Rules
Expoprint.io’s published refund policy says it does not accept ordinary returns of customized products unless a production or printing defect resulted from its error. A defect must be reported within 30 days after delivery with photographic evidence, and the company reviews whether the issue qualifies for a remedy. That is different from a general satisfaction-based return right for buyer’s remorse or an approved design that the customer later dislikes.
Check the Order Immediately
Open the shipment promptly, compare it with the packing list, and photograph any damaged or incorrect components. Do not wait until the night before the event to inspect the print or hardware. If something is wrong, contact the seller using the official support channel and preserve the packaging as needed.
Trade Show Booth Safety and Venue Compliance
A booth should attract visitors without blocking exits, creating unstable displays, or running exposed cables through walking paths. The event’s exhibitor manual normally governs installation rules and may address fire-resistant materials, ceiling clearance, storage, accessible routes, labor, and electrical work.
For Indoor Exhibits
Confirm display-height restrictions, electrical ordering, mounting requirements, and whether suspended or illuminated elements are allowed. Keep powered displays within their rated specifications and use the service provider authorized by the venue when required.
For Outdoor Tents
Follow the event organizer’s tent rules and the manufacturer’s anchoring instructions. Ground stakes may be prohibited on paved locations, while suitable ballast or other approved methods may be required. Do not assume that a portable frame is safe in strong wind or that printed sidewalls are suitable for all weather conditions.
For Products and Demonstrations
Secure shelves, samples, and screens using hardware rated for the expected loads. Leave room for wheelchair access and safe circulation where applicable. A photo-realistic online mockup cannot replace physical load ratings or the organizer’s approvals.
How to Measure the Success of an Event Display
A booth’s appearance matters, but the purpose of attending a show usually involves conversations, leads, product education, or sales opportunities. Establish a measurable goal before choosing accessories.
| Goal | Practical indicator | Useful improvement |
|---|---|---|
| Brand awareness | Qualified conversations and recall feedback | Clear signage and visual consistency |
| Lead generation | Valid contacts with permission to follow up | Defined call to action and staff process |
| Product demonstration | Completed relevant demos | Visible demo zone and sufficient space |
| Direct sales | Orders and attributable revenue | Clear product presentation and checkout workflow |
| Recruiting | Suitable candidate conversations | Welcoming layout and concise role information |
Treat these metrics as a learning process. The display alone does not create sales; staff training, audience fit, offers, follow-up, and the quality of the event also matter.
Common Mistakes When Using Expoprint.io
One mistake is purchasing a booth before checking the actual venue footprint and display rules. Another is treating the 3D design visualization as a substitute for reviewing print proofs. Customers may also confuse rush production with expedited door-to-door shipping or assume that a low advertised base price includes every accessory shown in a product photograph.
Additional problems include uploading low-resolution artwork, overcrowding the display with text, overlooking electrical requirements for backlit booths, and failing to test the assembly before traveling. A custom-print policy also makes last-minute design changes more consequential once an approved order enters production.
The most reliable buying approach is to choose a product that meets the venue rules, build a clear visual message, verify the exact package, check the proof, and plan delivery conservatively. These steps can reduce avoidable surprises without promising a flawless event.
Frequently Asked Questions
1. What does Expoprint.io sell?
Expoprint.io offers custom canopy tents, trade show booth systems, pop-up and tension-fabric displays, backlit exhibits, flags, backdrops, table covers, and related accessories. Availability and configurations depend on the chosen product.
2. Can I design a trade show booth online?
Yes. ExpoPrint advertises a browser-based 3D design studio, an artwork upload option, and complimentary design assistance. Customers should review the final PDF print proof carefully before approving production.
3. How quickly can ExpoPrint deliver an order?
The website lists regular and rush production tiers for applicable products, including one-, three-, and seven-business-day production options. Shipping and proof approval take additional time, so confirm the total delivery schedule for the specific order.
4. Does ExpoPrint accept returns on custom printed displays?
Its published policy generally limits returns to qualifying production or printing defects caused by the company. Buyers must report a suspected defect within 30 days of delivery and provide photographic evidence for review.
Conclusion
Expoprint.io provides a range of customizable event displays that can help businesses plan a coordinated trade show or outdoor promotional setup. Choosing effectively requires more than attractive graphics: the booth must fit the venue, support the team’s activities, meet safety requirements, and arrive with enough time for inspection. Compare complete package costs, review artwork proofs, and confirm production and shipping details before purchasing. Thoughtful planning gives every printed display a better chance of supporting useful conversations at the event.
