
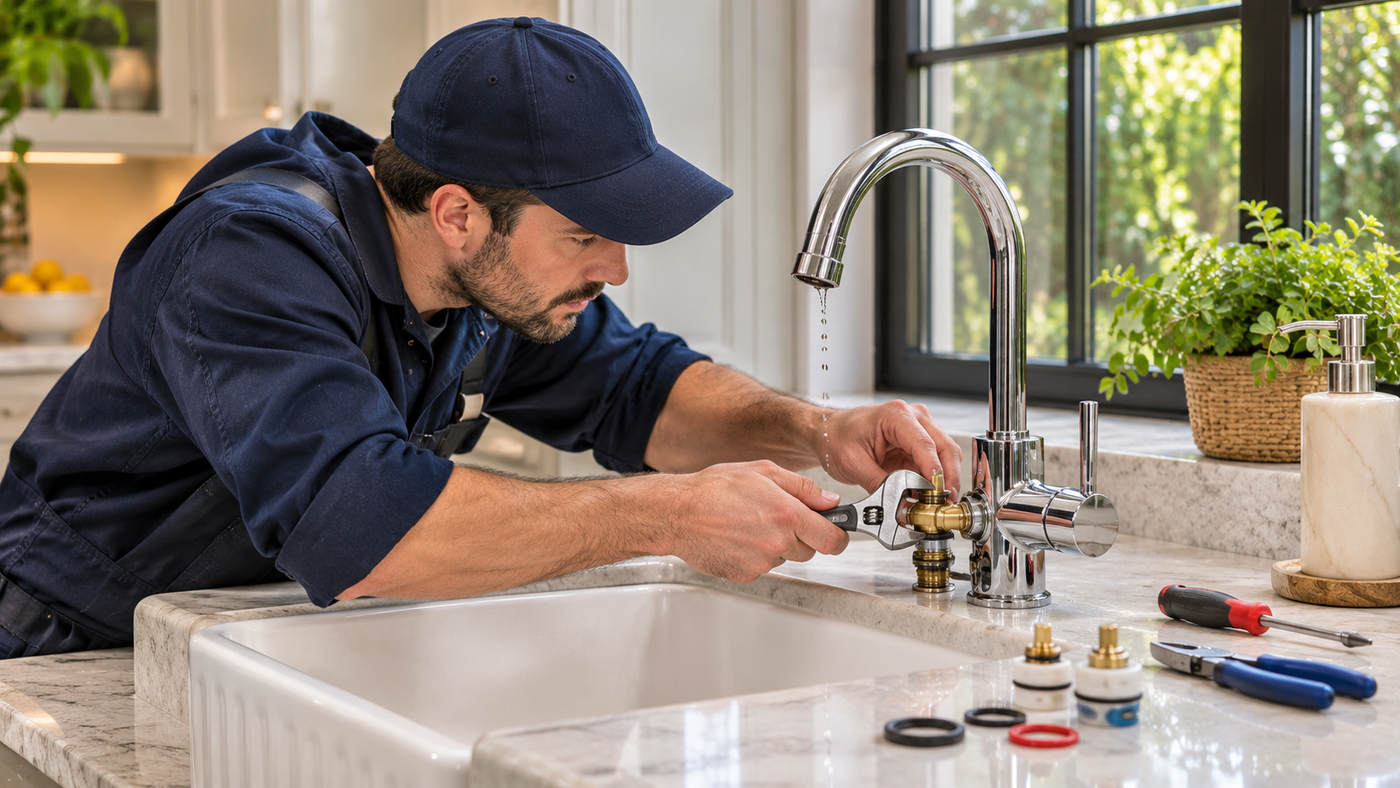
A dripping faucet may appear to be a minor household inconvenience, but continuous water leakage can waste substantial amounts of water, increase utility expenses, and indicate deterioration within a plumbing fixture. Whether the problem occurs in a kitchen, bathroom, or utility sink, identifying the underlying cause is essential for an effective and lasting repair. Fortunately, many common faucet leaks originate from replaceable components such as washers, cartridges, valve seats, and rubber seals.
According to the United States Environmental Protection Agency, a faucet leaking at approximately one drip per second can waste more than 3,000 gallons of water annually. This demonstrates why even small leaks deserve timely attention. US EPA
Understanding how different faucet mechanisms operate helps homeowners select suitable repair methods, avoid unnecessary replacement costs, and recognize situations requiring professional plumbing assistance. This comprehensive guide explains the causes of faucet leaks, seven practical repair solutions, essential maintenance techniques, and effective ways to prevent recurring problems.
What Is a Dripping Faucet and Why Does It Happen?
A dripping faucet is a plumbing fixture that continues releasing water even after its handle or control mechanism has been turned off. The problem usually occurs when an internal component no longer forms a reliable seal against water pressure.
In a properly functioning faucet, the valve mechanism controls the flow of water and prevents it from passing through the spout when closed. Over time, normal use, mineral deposits, corrosion, or damaged components may interfere with this process.
The most common causes include deteriorated rubber washers, damaged ceramic cartridges, worn valve seats, defective O rings, and debris trapped inside the valve assembly.
The correct repair depends on the faucet’s design and the precise location of the leak.
Why Small Faucet Leaks Should Not Be Ignored
A dripping faucet can have consequences beyond the irritating sound of falling water.
Continuous leakage contributes to unnecessary water consumption. Depending on the severity of the problem, it may also increase household water expenses.
Leaks around the faucet base or beneath the sink present additional concerns because moisture can damage cabinetry, countertops, flooring, and surrounding materials.
Persistent dampness can also create conditions that support mold growth.
Addressing a leak early helps protect plumbing components while reducing the possibility of more expensive repairs.
How to Identify the Different Types of Faucet Leaks
Before attempting a repair, determine where the water is escaping and which components may be responsible.
A dripping faucet does not always indicate the same mechanical problem. Different leak locations often require different solutions.
Water Dripping From the Spout
Water continuing to emerge from the spout after the handle is fully closed typically suggests that the internal valve is not sealing properly.
Depending on the faucet design, the cause may be a worn washer, damaged cartridge, deteriorated valve seat, or debris trapped against a sealing surface.
A small amount of residual water immediately after shutting off a faucet is not necessarily a defect.
However, persistent dripping after the remaining water has drained indicates that further inspection may be needed.
Water Leaking Around the Handle
Moisture appearing near the handle often indicates problems involving internal seals, cartridge components, or retaining hardware.
Some leaks become noticeable only when the faucet is running.
For example, a damaged O ring may allow water to escape around a movable component.
Manufacturer documentation from Moen confirms that worn or damaged sealing components can contribute to leakage around faucet assemblies. Moen Solutions+1
Water Collecting Around the Faucet Base
Water accumulating where the faucet meets the countertop may originate from a faulty internal seal, loose connection, damaged hose, or water running back from the spout.
Dry the surrounding area and observe where moisture first appears.
Avoid assuming that water collecting at the base always means the mounting gasket is defective.
Water Leaking Beneath the Sink
Leaks beneath a sink may involve supply hoses, connection fittings, shutoff valves, or the faucet body.
These problems require different troubleshooting methods from a dripping faucet that releases water only through its spout.
If water is actively escaping beneath the sink, shut off the affected supply and investigate promptly.
Essential Tools and Preparation Before Repairing a Dripping Faucet
Proper preparation helps protect plumbing components and reduces the likelihood of accidental water damage.
The necessary tools depend on the faucet’s model and internal construction.
Commonly useful equipment includes:
- Adjustable wrench for compatible fittings.
- Screwdrivers for removing handles and retaining screws.
- Allen wrench for recessed handle screws.
- Replacement cartridges, washers, or sealing rings.
- Clean cloths for wiping components and absorbing moisture.
- A small container for retaining screws and other parts.
- Manufacturer approved silicone lubricant when required.
- A flashlight for inspecting concealed connections.
Obtain the appropriate replacement components before disassembling the fixture whenever possible.
Not all faucets use interchangeable parts, even when their external appearance is similar.
Turn Off the Water Supply Safely
Locate the shutoff valves beneath the sink and close the hot and cold supplies.
Open the faucet briefly to relieve remaining pressure and confirm that the water supply has stopped.
If a local valve is seized, damaged, or unable to stop the flow, do not force it.
Use an appropriate upstream shutoff if you know how to operate it safely, or contact a qualified plumber.
Protect the Sink and Work Area
Cover the drain opening to prevent small screws, springs, and washers from falling into the plumbing.
Place a towel over delicate sink surfaces to minimize accidental scratches.
Photograph the assembly during disassembly so individual parts can be reinstalled in their original positions.
This simple step can be especially helpful when working with unfamiliar faucet designs.
7 Proven Ways to Fix a Dripping Faucet
Repairing a dripping faucet starts with identifying the components responsible for controlling water flow and maintaining internal seals.
The following seven solutions address common causes, but not every solution applies to every faucet.
Always follow the instructions for the specific manufacturer and model.
1. Replace Worn Rubber Washers
Compression faucets commonly use rubber washers to control water flow.
When the handle closes, a washer presses against a valve seat to restrict water movement.
Repeated compression can gradually cause the washer to become flattened, hardened, or damaged.
When the washer no longer seals correctly, water may continue escaping through the spout.
How to Replace a Faucet Washer
After shutting off the water supply, remove the handle according to the manufacturer’s instructions.
Access the valve stem and carefully remove the existing washer.
Inspect the washer for cracks, deformation, or excessive wear.
Select a replacement that matches the original dimensions and design.
Install the new washer securely, reassemble the faucet, and restore the water supply gradually.
A dripping faucet caused by a deteriorated compression washer may stop leaking once the correct replacement is installed.
However, a damaged valve seat may prevent even a new washer from sealing effectively.
2. Replace Damaged O Rings
O rings are circular sealing components used in many faucet assemblies.
They help maintain watertight connections around moving or stationary plumbing parts.
Over time, these seals may become worn, torn, or distorted.
A dripping faucet accompanied by moisture around the spout or handle may indicate a damaged O ring, depending on the fixture’s design.
Begin by identifying the faucet model and checking its replacement parts diagram.
Remove the relevant assembly only after isolating the water supply.
Inspect the sealing rings and their contact surfaces for visible damage.
Replace defective rings with manufacturer compatible components.
Choosing the Correct Lubricant
Certain faucet manufacturers recommend silicone based lubricant for specific rubber seals.
Moen, for example, advises using suitable silicone grease when replacing particular spout O rings and warns that petroleum based products may adversely affect rubber components. Moen Solutions
Follow the applicable manufacturer’s instructions rather than applying arbitrary lubricants.
Reassemble the faucet carefully and check for leakage.
3. Repair or Replace a Faulty Faucet Cartridge
Cartridge faucets use internal components to regulate water flow and temperature.
These mechanisms are commonly found in modern kitchen and bathroom fixtures.
When a cartridge becomes damaged or its internal seals deteriorate, it may allow water to continue passing through the spout.
Moen identifies cartridge problems as a common cause of persistent spout leakage in its cartridge based faucets. Moen Solutions
To repair a dripping faucet involving a defective cartridge, first determine the exact faucet model.
Remove the handle and any necessary retaining components according to the product instructions.
Extract the cartridge using the recommended procedure.
Inspect the cartridge and surrounding valve housing for damage or debris.
Install a compatible replacement, ensuring that its orientation matches the manufacturer’s requirements.
Incorrect cartridge installation can affect handle movement, temperature control, or sealing performance.
Why Cartridge Compatibility Matters
Cartridges with similar external dimensions may have different internal mechanisms or connection points.
Using an incompatible component can prevent the faucet from functioning properly.
Verify the replacement part number through the manufacturer’s product documentation whenever possible.
4. Inspect and Address a Damaged Valve Seat
The valve seat is a sealing surface within certain faucet designs.
In compression fixtures, the washer presses against this surface when the handle is closed.
If the valve seat becomes corroded, pitted, or damaged, water may pass through despite having a functional washer.
A dripping faucet that continues leaking after a washer replacement may therefore require inspection of the valve seat.
With the water isolated and the faucet disassembled according to its instructions, examine the seating surface using adequate lighting.
Look for corrosion, uneven wear, or visible damage.
Some faucet designs have replaceable valve seats. Others require specialized repair methods or replacement of a larger assembly.
Do not attempt aggressive grinding or reshaping without confirming that the manufacturer permits that procedure.
Uncontrolled material removal may make the sealing problem worse.
A qualified plumber can determine whether repair or replacement is appropriate when the seating surface is severely damaged.
5. Replace Worn Seats and Springs in Compatible Faucets
Certain ball type and other faucet mechanisms use replaceable rubber seats and springs.
These components help maintain the pressure needed to form a seal within the valve assembly.
As the seats wear or the springs deteriorate, water may continue escaping after the handle is closed.
Delta’s maintenance guidance identifies worn seats and springs as a potential cause of spout leaks in compatible faucet models. Delta Faucet
If the faucet uses this mechanism, obtain the manufacturer specified repair kit.
Shut off the water supply and remove the handle and relevant internal components.
Carefully note the orientation of the existing seats and springs.
Remove the worn pieces and install the replacements according to the product instructions.
Clean the relevant contact surfaces before reassembly.
A dripping faucet caused by worn seats and springs may be resolved without replacing the entire fixture.
However, additional valve components may also need inspection if leakage continues.
6. Remove Mineral Deposits and Internal Debris
Water naturally contains dissolved minerals in varying concentrations.
In areas with hard water, calcium and magnesium deposits may accumulate around plumbing fixtures.
Sediment and mineral debris can interfere with faucet mechanisms when particles become trapped against sealing surfaces.
A dripping faucet may therefore require cleaning in addition to replacing worn components.
After isolating the water supply, inspect accessible parts using the manufacturer’s recommended procedure.
Remove loose debris with a soft cloth or appropriate cleaning tool.
If mineral buildup is present, use only cleaning products approved for the relevant materials and finishes.
Avoid harsh abrasive cleaners that could damage polished surfaces or sealing components.
Can Cleaning the Aerator Stop a Leak?
The aerator is located at the faucet outlet and helps shape the water stream.
Cleaning it can improve water flow when sediment has accumulated.
However, the aerator is not normally the component that shuts off incoming water.
Cleaning an aerator alone will not reliably correct a defective internal shutoff seal.
If the dripping faucet continues leaking after cleaning, inspect the valve mechanism rather than repeatedly treating the outlet.
7. Repair Loose or Defective Sealing Connections
Some leaks originate around the spout assembly, flexible hose connections, or other accessible faucet components.
These problems may initially resemble an ordinary faucet drip.
For example, water may emerge near a kitchen faucet’s base and run across the countertop.
Before tightening anything, identify the actual source of the leak.
Inspect accessible connections for looseness, damaged washers, or deteriorated seals.
Follow the manufacturer’s instructions for correcting the affected connection.
Do not overtighten fittings because excessive force can damage threads, sealing surfaces, or plastic components.
Likewise, do not assume that thread sealing tape is suitable for every connection.
Many plumbing fittings rely on compression surfaces or washers rather than sealing tape.
If a dripping faucet is accompanied by water escaping from a cracked housing, replacement of the defective assembly may be safer than attempting a temporary seal.
How to Test a Faucet After Completing Repairs
Testing is an essential final step because replacing a component does not automatically establish that the leak has been resolved.
Once the fixture has been reassembled, ensure that all components are correctly positioned.
Restore the water supply gradually and observe the faucet carefully.
Operate the handles through their normal range and check for unusual resistance or movement.
Inspect the spout, handle area, base, and accessible connections for moisture.
Then close the handle and monitor the outlet.
A dripping faucet should no longer release continuous water once any residual water has drained.
Check Both Hot and Cold Water Functions
For a faucet with separate hot and cold controls, test each side.
Confirm that the handles operate normally and that temperature selection behaves as expected.
Inspect the area beneath the sink while the faucet runs.
If water pressure is unusually low after repair, check whether the supply valves are fully open and whether approved cleaning of the aerator is necessary.
Persistent leakage after replacing a component may indicate an incorrect part, installation problem, or another damaged internal surface.
How to Prevent a Dripping Faucet in the Future
Preventive plumbing maintenance helps extend the service life of faucet components and identify developing problems before they become serious.
Although normal mechanical wear cannot be eliminated completely, consistent care can reduce avoidable damage.
Avoid Excessive Force When Closing Handles
Some homeowners tighten faucet handles aggressively when trying to stop water flow.
For compression faucets, excessive force may place additional stress on washers and related components.
Use normal operating pressure and investigate persistent leaks instead of repeatedly forcing the handle closed.
Keep Faucet Components Clean
Regular cleaning helps prevent mineral deposits and surface contamination.
Use products appropriate for the faucet’s finish and materials.
Clean accessible aerators when water flow becomes restricted, following manufacturer recommendations.
Avoid using abrasive tools on delicate sealing surfaces.
Monitor Water Pressure
Excessive household water pressure can contribute to wear and increase stress on plumbing components.
If several fixtures experience recurring problems, ask a qualified plumber to evaluate the plumbing system and measure water pressure.
Do not adjust pressure regulating equipment without understanding the appropriate requirements for the installation.
Inspect Plumbing Fixtures Periodically
Check faucets, visible connections, and the areas beneath sinks for moisture.
Look for corrosion, staining, unusual sounds, or recurring drips.
A dripping faucet discovered early may require a relatively straightforward component replacement rather than more extensive work.
Keep the faucet’s model information and any available warranty documents for future maintenance.
When Should You Call a Professional Plumber?
Some faucet problems can be addressed with basic household tools, but others require experienced diagnosis.
Consider professional assistance when a dripping faucet persists despite appropriate component replacement.
A plumber may also be needed when shutoff valves do not work, internal components are seized, the faucet body is cracked, or water is leaking into concealed cabinetry or walls.
Corroded supply connections and unfamiliar specialized fixtures can present additional repair challenges.
Repair or Replace the Entire Faucet?
The decision depends on the fixture’s condition, replacement part availability, and overall repair complexity.
Repair is often reasonable when a compatible cartridge, washer, or sealing component is available and the remaining faucet structure is sound.
Replacement may be more practical when the body is severely corroded, essential components are unavailable, or multiple failures have developed.
A dripping faucet does not automatically require an entirely new fixture.
Evaluate the specific defect before making that decision.
Frequently Asked Questions
1. What is the most common cause of a dripping faucet?
Worn washers, damaged cartridges, and deteriorated sealing components are common causes. The most likely problem depends on whether the fixture uses a compression, cartridge, ball, or ceramic disc mechanism.
2. Can I repair a dripping faucet without hiring a plumber?
Many homeowners can replace compatible washers, cartridges, or seals using appropriate tools and manufacturer instructions. Professional assistance is advisable when water isolation or disassembly presents difficulties.
3. How much water can a dripping faucet waste?
According to the EPA, a faucet dripping approximately once per second can waste more than 3,000 gallons annually. The actual amount depends on the drip rate and duration. US EPA
4. Why is my dripping faucet still leaking after replacing the washer?
The replacement washer may be incorrect, the valve seat may be damaged, or another internal component may have deteriorated. Confirm the faucet mechanism and inspect the remaining sealing surfaces.
5. Can high water pressure cause a dripping faucet?
Excessive water pressure can place additional stress on plumbing components and aggravate existing weaknesses. Persistent leakage still requires identification of the faulty component or connection.
6. Is it better to repair or replace a dripping faucet?
Repair is generally worth considering when the fixture is structurally sound and replacement parts are available. Replacement may be preferable when the faucet is severely damaged or cannot be repaired reliably.
Conclusion
A dripping faucet should be addressed promptly to prevent unnecessary water waste and reduce the possibility of additional plumbing damage. Understanding the differences between washers, cartridges, valve seats, and sealing components helps homeowners choose appropriate repair methods. Careful preparation, compatible replacement parts, and regular maintenance can improve faucet reliability and reduce recurring leaks. When the cause remains uncertain or the repair involves damaged plumbing connections, professional assistance offers a safer path toward a lasting solution.
