
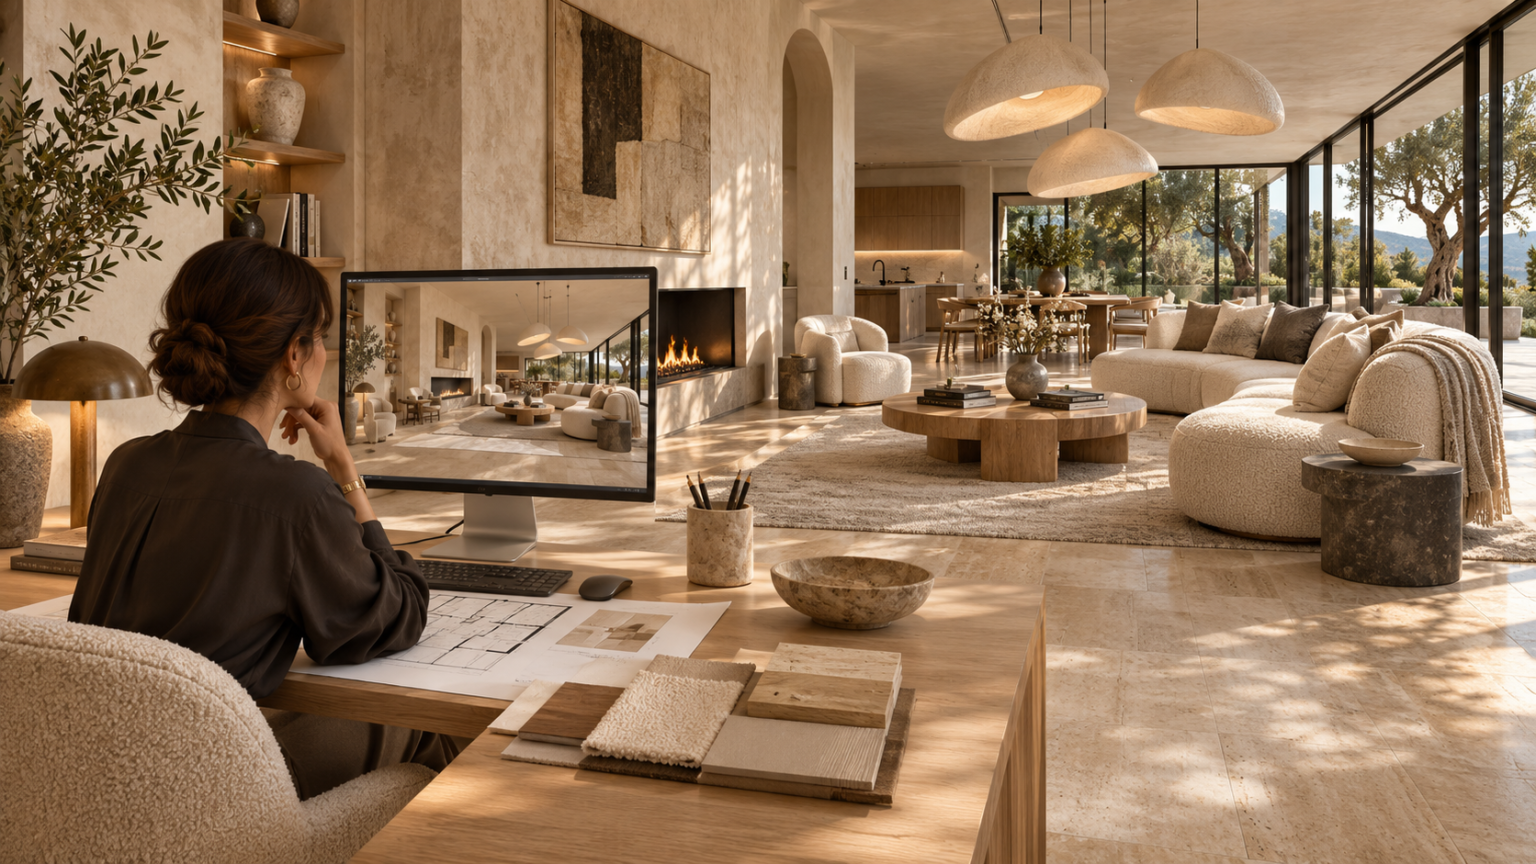
Designing an attractive and functional interior requires careful planning. Homeowners must consider furniture arrangements, lighting, colours, materials, and available space before making expensive decisions. However, traditional drawings and material samples do not always communicate how everything will look together. 3D interior rendering provides a visual representation of a proposed space, allowing clients and designers to explore realistic room layouts before construction or renovation begins. As a result, design teams can communicate ideas more clearly, compare alternatives, and identify potential problems earlier.
Modern visualization technology has changed how residential and commercial interiors are presented. Instead of imagining a finished room from a floor plan, clients can review digital images showing furniture, flooring, lighting, and architectural details.
Nevertheless, creating an effective rendering requires accurate measurements, suitable materials, thoughtful lighting, and professional design decisions.
This guide explains how interior rendering works, its main advantages, the production process, factors affecting cost, and practical ways to achieve convincing results.
What Is 3D Interior Rendering?
3D interior rendering is the process of creating digital images that illustrate how an interior space may appear after construction, renovation, or decoration.
Designers use specialized software to build a three dimensional representation of a room. They then add surface materials, furniture, lighting, and decorative elements.
A rendering engine calculates how light interacts with the digital scene to create the final image.
Depending on the project, the result may resemble a photograph or present a simpler conceptual view.
According to Autodesk, architectural rendering helps communicate design intent, explore alternatives, and identify potential problems before construction.
How Does Interior Rendering Work?
The process usually begins with floor plans, dimensions, photographs, and a design brief.
First, the designer develops a digital model of the space.
Next, materials and furniture are placed within the model.
Then, lighting and camera positions are adjusted to create the desired appearance.
Finally, the rendering software produces an image that can be reviewed and refined.
The finished visual helps clients understand the proposed design without relying entirely on technical drawings.
3D Modeling vs 3D Rendering
Although these terms are related, they describe different activities.
3D modeling involves creating the geometry of walls, ceilings, furniture, windows, and other objects.
Rendering involves converting that digital model into a visual image using lighting, materials, and camera settings.
Therefore, a detailed model does not automatically produce a realistic image.
Both stages require careful attention.
Why 3D Interior Rendering Matters in Modern Design
Interior projects involve numerous decisions that can influence cost, comfort, and appearance.
For example, selecting a large sofa without checking available circulation space may create practical problems after installation.
Similarly, choosing flooring from a small sample may make it difficult to imagine how the material will appear throughout an entire room.
Digital visualization provides another way to examine these decisions.
Better Communication Between Designers and Clients
Clients may find technical floor plans difficult to interpret.
However, a realistic image can communicate furniture scale, colour combinations, and spatial relationships more clearly.
As a result, clients can provide more specific feedback.
Instead of saying a room does not feel right, they may identify a particular issue involving lighting, furniture, or materials.
Earlier Identification of Design Problems
A digital model can reveal concerns involving furniture placement, room proportions, and sightlines.
For example, a proposed dining table may appear too large for the available area.
Adjusting the model before purchasing furniture may prevent an unsuitable selection.
Nevertheless, a rendering does not replace construction documents or professional technical verification.
More Confident Design Decisions
Clients can compare several design options before making final selections.
This may involve reviewing different wall colours, flooring materials, or lighting arrangements.
Although visualization cannot guarantee a particular result, it helps establish clearer expectations.
7 Smart Tips for Creating Stunning 3D Interior Renderings
A successful rendering should communicate more than visual beauty. It must also represent the proposed interior accurately.
The following practices can improve both realism and usefulness.
1. Start With Accurate Room Measurements
Accurate dimensions form the foundation of a dependable digital model.
Before creating the scene, collect the room’s length, width, and ceiling height.
Also, record the positions of windows, doors, columns, and other fixed features.
Even small measurement errors can affect furniture placement and circulation.
For example, an incorrectly positioned doorway may make a furniture arrangement appear more practical than it really is.
Essential Information for a Digital Model
Useful project information includes:
- Existing floor plans and measurements
- Ceiling heights and structural features
- Window and door locations
- Built in cabinetry dimensions
- Major furniture measurements
- Relevant electrical and lighting positions
Where available, reliable architectural drawings can reduce uncertainty.
However, measurements should be checked against existing site conditions when necessary.
2. Choose Realistic Materials and Textures
Material selection strongly influences the appearance of a rendered interior.
Wood, stone, fabric, metal, and glass interact with light differently.
Therefore, applying the correct colour alone is not enough.
Professional rendering software can simulate properties such as surface roughness, reflectivity, and texture.
For example, polished marble reflects light differently from natural oak flooring.
Similarly, linen upholstery has a different surface appearance from smooth leather.
Match Materials to Real Products
When the client has selected specific products, use accurate references whenever possible.
These may include manufacturer photographs, finish specifications, and physical samples.
However, screen colours and lighting conditions can affect how materials appear in images.
A rendering should therefore be treated as a design representation rather than an exact colour guarantee.
3. Create Natural and Balanced Lighting
Lighting is one of the most important elements in realistic interior visualization.
Poor lighting can make a carefully designed room appear flat, dark, or artificial.
In contrast, balanced illumination helps communicate depth, materials, and atmosphere.
Start by considering how daylight enters through windows.
Then, add artificial lighting that reflects the proposed interior design.
For example, pendant lights may provide focused illumination above a dining table, while recessed fixtures contribute to general room lighting.
Understanding Natural and Artificial Light
Natural lighting depends on factors such as window orientation, sunlight direction, and surrounding structures.
Artificial lighting depends on fixture placement, light output, and distribution.
Some rendering programs support photometric lighting data supplied by manufacturers.
Autodesk notes that appropriate light source information can improve the representation of real lighting conditions.
Nevertheless, the final lighting design should be checked against actual fixture specifications and project requirements.
4. Use Proper Furniture Scale and Placement
Furniture makes a rendered room feel occupied and functional.
However, incorrect furniture dimensions can create misleading impressions.
A sofa that appears comfortable in a digital image may create circulation problems if the model uses unrealistic proportions.
Therefore, furniture should match the proposed products or reliable dimensional references.
Consider access to doors, seating arrangements, and movement between furniture.
Additionally, evaluate how the room will be used.
A family living room may need comfortable seating and practical storage, while a home office requires suitable workspace arrangements.
The objective is to balance appearance with everyday functionality.
5. Select Camera Angles That Explain the Design
Camera placement influences how viewers understand a room.
An extreme wide angle view may make a compact space appear larger than it is.
Similarly, an unusually high camera position can distort the perceived scale of furniture.
Therefore, choose viewpoints that communicate the space naturally.
Eye level perspectives often help viewers understand how a room may feel when occupied.
However, additional views may be necessary to explain important design features.
Useful Interior Camera Views
A living room presentation might include a main perspective showing furniture placement, a secondary angle showing the connection to adjoining spaces, and a close view of important materials.
Each image should answer a useful design question.
Avoid creating several nearly identical views that add little new information.
6. Add Realistic Details Without Overcrowding
Decorative objects help establish scale and atmosphere.
For example, books, cushions, plants, and artwork can make an interior feel more natural.
However, excessive decoration may distract attention from the actual design.
Start with the important architectural and furniture elements.
Then, add selected accessories that support the intended style.
A minimalist apartment may need only a few carefully chosen objects.
Meanwhile, a traditional living room may contain more decorative details.
The key is consistency.
Use accessories to communicate how the space may function rather than simply filling empty surfaces.
7. Review and Refine Before Final Delivery
The first rendering should not automatically become the final version.
Professional visualization often requires several adjustments.
Review the image for incorrect dimensions, lighting problems, unrealistic reflections, and mismatched materials.
Next, compare it with the approved design brief.
Check whether furniture dimensions and product selections remain accurate.
Additionally, examine the image at its intended viewing size.
A small preview may hide errors that become visible in a high resolution presentation.
Finally, confirm that the rendering clearly represents the design decisions being presented.
How the 3D Interior Rendering Process Works
Professional rendering projects generally follow a structured workflow.
Understanding these stages helps clients prepare useful information and avoid unnecessary revisions.
Step 1: Collect Project Requirements
The designer begins by reviewing the project scope.
This may include floor plans, photographs, inspiration images, furniture selections, and material preferences.
At this stage, clients should explain the intended style and how the room will be used.
For example, a living room intended for formal entertaining may need different furniture arrangements from a family television room.
Clear requirements make later decisions easier.
Step 2: Develop the Digital Model
The artist creates the room geometry using suitable modeling software.
Walls, openings, ceilings, floors, and major architectural components are placed according to the available measurements.
Next, furniture and built in elements are introduced.
The model should be reviewed before detailed rendering begins.
Otherwise, errors in the geometry may require extensive corrections later.
Step 3: Apply Materials and Lighting
Once the model is approved, the designer adds surface finishes and lighting.
This stage helps establish the visual character of the room.
For example, light timber flooring and neutral walls may create a different atmosphere from dark stone and contrasting cabinetry.
Lighting is then adjusted to represent the intended conditions.
Step 4: Produce Preview Images
Preview renders allow the client to examine the composition without requiring the highest possible output quality.
They are useful for reviewing camera angles, materials, and furniture arrangements.
The client can identify necessary changes before final rendering.
Step 5: Final Rendering and Delivery
After approval, the artist produces the final images.
The required resolution and file format depend on how the visuals will be used.
Website presentations, printed marketing materials, and large displays may require different specifications.
The final deliverables should match the agreed scope.
Different Types of 3D Interior Rendering Services
Interior visualization can support several design and marketing purposes.
Residential Interior Rendering
Residential rendering focuses on spaces such as living rooms, bedrooms, kitchens, bathrooms, and home offices.
Homeowners may use these visuals to review proposed renovations before purchasing materials or furniture.
Interior designers can also present alternative layouts and finishes.
Commercial Interior Rendering
Commercial projects may involve offices, restaurants, retail stores, hotels, or other business environments.
These renderings help stakeholders evaluate layout, furniture, lighting, and the intended customer experience.
However, technical requirements involving accessibility, fire safety, and building regulations still require appropriate professional assessment.
Photorealistic Interior Rendering
Photorealistic rendering aims to create images with convincing light, materials, reflections, and proportions.
It can be useful for client presentations and property marketing.
Nevertheless, visual realism should not be confused with construction accuracy.
Interior Walkthroughs and Virtual Tours
Some projects use animated walkthroughs or interactive environments.
These allow viewers to explore connections between rooms and examine the proposed layout from different positions.
According to Chaos, real time visualization tools are particularly useful during interactive design reviews.
However, animations and virtual tours generally involve different production requirements from individual still images.
Popular Software for Interior Rendering
Several software applications support interior modeling and visualization.
The most suitable option depends on the project, existing design files, technical experience, and required output.
SketchUp
SketchUp is commonly used for developing three dimensional design models.
Its modeling tools can support room layouts, furniture arrangements, and early design exploration.
Additional rendering tools may be used to create more realistic presentations.
Autodesk Revit
Revit supports building information modeling workflows.
It can help design teams coordinate building geometry and related project information.
Rendering capabilities allow users to develop visual representations from building models.
V-Ray
V-Ray is a rendering engine used for detailed architectural visualization.
It offers controls for lighting, materials, cameras, and final image quality.
According to Chaos documentation, rendering settings can be adjusted to balance image quality with processing time.
Enscape
Enscape supports real time visualization and interactive design exploration.
It can be useful when clients and designers need to examine changes during a review session.
However, software suitability depends on the workflow and desired level of visual detail.
Blender
Blender provides tools for modeling, material creation, lighting, and rendering.
It can support interior visualization projects, although professional results require suitable technical skills and preparation.
How Much Does 3D Interior Rendering Cost?
The cost of 3D interior rendering varies depending on project requirements.
A simple room visualization usually involves different work from a detailed commercial interior with custom furniture and several camera views.
Therefore, a universal price would not accurately represent every project.
Factors That Affect Rendering Costs
Important considerations include the size of the space, complexity of the model, material requirements, image resolution, and number of final views.
For example, a standard bedroom using readily available furniture models may require less development than a luxury kitchen with custom cabinetry and detailed lighting.
Additional revisions can also affect the cost.
Still Images vs Walkthroughs
A single still image captures the interior from one viewpoint.
An animated walkthrough requires multiple rendered frames and additional planning.
Consequently, animation projects may involve more production work.
Interactive presentations have their own technical and delivery requirements.
How to Compare Rendering Quotations
Ask what the price includes before hiring a provider.
Confirm the number of images, expected resolution, revision allowance, delivery schedule, and whether editable model files are included.
Also, identify who will supply floor plans, furniture specifications, and material references.
A clear project scope helps reduce misunderstandings.
3D Interior Rendering vs Traditional Design Drawings
Traditional drawings and rendered images serve different purposes.
Floor plans communicate room dimensions, wall positions, circulation, and other technical information.
Elevations and construction details provide information required for fabrication and installation.
Meanwhile, renderings help viewers understand the visual appearance of the proposed space.
Therefore, these materials work best together.
A realistic kitchen image may show cabinetry and finishes beautifully, but the contractor still needs appropriate measurements and installation details.
Similarly, a rendered bathroom cannot establish compliance with plumbing or electrical requirements by appearance alone.
Design visualization supports decision making. It does not replace technical documentation or professional approvals.
How 3D Interior Rendering Supports Home Renovations
Renovation projects often involve significant financial decisions.
Homeowners may need to select flooring, lighting, cabinetry, and furniture before the finished space exists.
A digital rendering can help compare these selections.
Visualizing Kitchen Renovations
Kitchen rendering allows homeowners to review cabinetry colours, countertop materials, and lighting arrangements.
It can also illustrate how appliances and storage features relate to the room.
However, dimensions and installation requirements must be verified separately.
Planning Living Room Improvements
Living room visualization can help compare furniture layouts and decorative styles.
For example, homeowners can examine how different sofas affect available walking space.
They can also assess whether the proposed lighting supports the intended atmosphere.
Reviewing Bedroom Designs
Bedroom renderings may help communicate bed placement, wardrobe arrangements, and material combinations.
This can be particularly useful when built in furniture is being considered.
As a result, clients can provide more informed feedback before manufacturing begins.
Common Mistakes to Avoid in Interior Visualization
One common mistake is prioritizing attractive images over accurate room dimensions.
A visually impressive rendering may still misrepresent the space if furniture or architectural features are incorrectly scaled.
Another problem is using unrealistic lighting.
Excessively bright windows or inconsistent shadows can create an appearance that differs substantially from the proposed conditions.
Additionally, some projects use generic materials that do not match the products clients intend to purchase.
Therefore, important finishes should be based on verified specifications whenever possible.
Clients should also avoid requesting unlimited changes without establishing a revision process.
Finally, never treat a rendering as proof that a particular design meets building regulations or technical performance requirements.
How to Choose a Professional 3D Interior Rendering Service
Choosing the right visualization provider requires evaluating both design understanding and technical capability.
Start by reviewing previous projects.
Look for convincing lighting, accurate proportions, suitable furniture placement, and consistent material quality.
Next, ask about the production workflow.
A reliable provider should explain the required project information and how revisions are handled.
What Should You Ask Before Hiring?
Consider asking:
- What project files are required?
- How many final views are included?
- Can specific furniture and materials be represented?
- How many revisions are permitted?
- What file formats will be delivered?
- Is the editable model included?
- What happens if the project scope changes?
Additionally, discuss image usage rights, confidentiality, and the expected delivery schedule.
Clear agreements help both parties understand their responsibilities.
The Role of AI in Modern Interior Rendering
Artificial intelligence is becoming part of some visualization workflows.
AI assisted tools may help explore visual styles, develop preliminary concepts, and modify certain image elements.
However, generated imagery can introduce details that do not match actual room measurements or approved materials.
Therefore, AI images should not automatically replace accurate digital models.
For early inspiration, generated concepts may be useful.
Meanwhile, detailed renovation planning generally requires reliable dimensions and consistent design information.
A practical workflow uses AI where it adds value while maintaining human review and appropriate technical verification.
Frequently Asked Questions
What is 3D interior rendering used for?
3D interior rendering helps visualize proposed rooms, furniture layouts, materials, and lighting before renovation, construction, or design approval.
How much does 3D interior rendering cost?
Pricing depends on room complexity, modeling requirements, rendering quality, number of views, revisions, and whether animations are included.
Is 3D interior rendering better than 2D drawings?
Neither replaces the other. Renderings communicate visual appearance, while technical drawings provide dimensions and construction information.
What software is used for 3D interior rendering?
Common tools include SketchUp, Revit, Blender, V-Ray, and Enscape. The best combination depends on project requirements and technical experience.
How long does an interior rendering project take?
Completion time varies with project size, available design information, detail requirements, rendering complexity, and revision rounds.
Can AI create realistic interior renderings?
Yes, AI can support visual concept development. However, accurate project planning still requires verified measurements, materials, and professional review.
Conclusion
3D interior rendering helps transform design concepts into visual presentations that clients can understand before construction begins. Accurate modeling, realistic materials, balanced lighting, and thoughtful camera placement are essential for dependable results. Although rendering cannot replace technical drawings or professional approvals, it can improve communication and support better design decisions. With a clear project brief and suitable visualization workflow, homeowners and designers can explore interior possibilities with greater confidence.
