
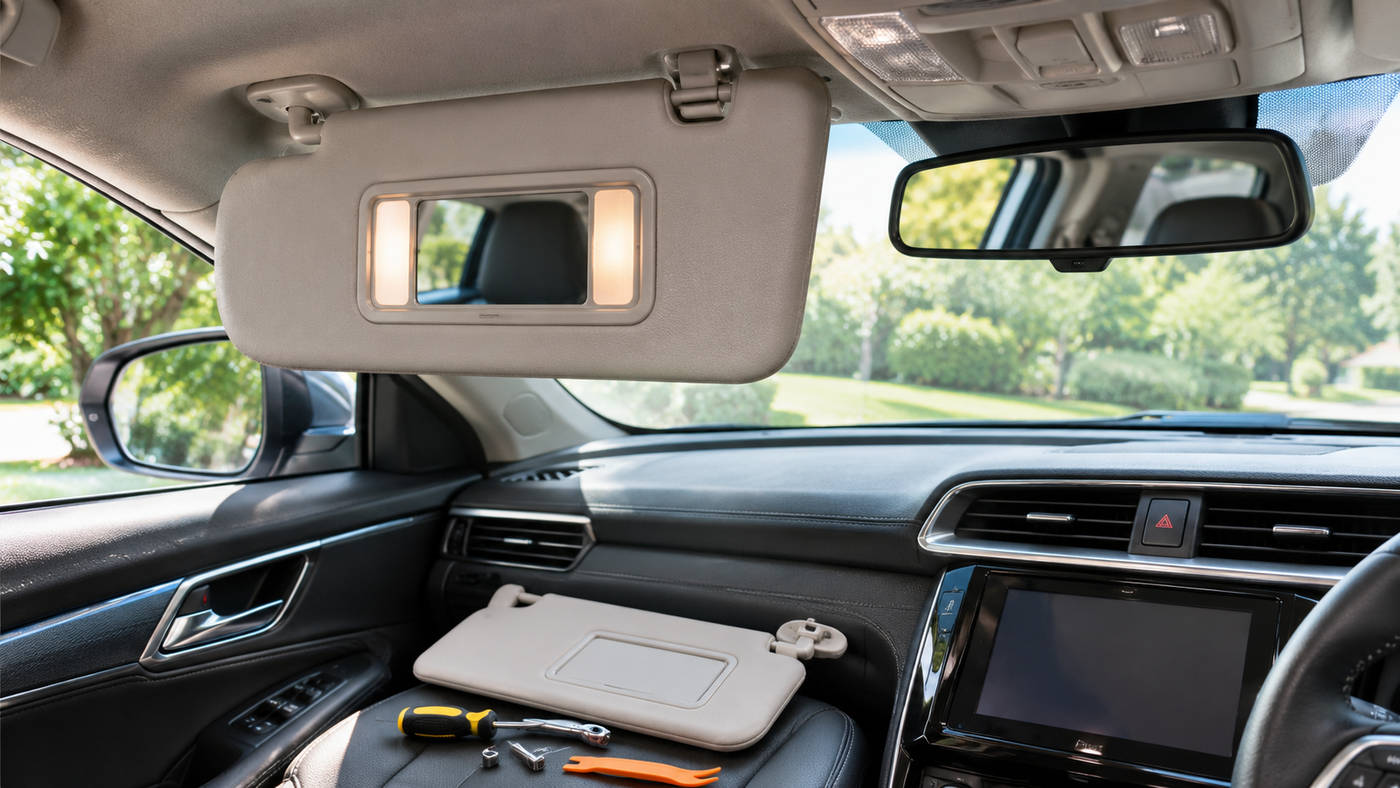
A replacement sun visor can restore useful shade when the original panel droops, its mounting arm cracks, or its vanity mirror stops working. Because direct sunlight can make the road difficult to see, a secure and correctly positioned visor matters for comfort and visibility. The key is diagnosing the fault, choosing a compatible assembly, and installing it without damaging interior trim or nearby safety equipment. This guide explains fitment, materials, costs, installation, and long term maintenance.
Why a Properly Working Sun Visor Matters
A vehicle sun visor is a movable interior panel that blocks direct sunlight entering through the windshield or side window. It normally pivots downward for frontal glare and swings sideways when sunlight enters near the door. Some models extend along a sliding rod, while others incorporate illuminated mirrors, document holders, or electronic controls.
A functional visor helps drivers respond to changing sunlight without constantly adjusting their seating position. A loose panel can also become a distraction if it repeatedly drops into the driver’s field of view.
Signs That the Original Visor Needs Attention
Common symptoms include a visor that will not stay raised, a panel that hangs at an awkward angle, a broken hinge, a detached support clip, damaged upholstery, or a cracked vanity mirror.
Not every symptom calls for complete replacement. A sound visor with a broken center retainer may only need a new clip. By contrast, a fractured pivot inside the panel often makes replacing the whole visor more practical than attempting a temporary repair.
1. Identify the Exact Problem Before Buying
Begin by moving the visor slowly through its normal range while the vehicle is parked. Check whether it holds each position, whether the outer end locks into the windshield side support, and whether the arm rotates smoothly.
A Visor That Sags or Will Not Stay Up
A sagging panel often points to worn internal friction components or a damaged pivot. First check whether the roof mounting bracket is loose. If the bracket is secure and the visor still falls, the internal mechanism may be at fault.
A Broken Clip or Mounting Bracket
A retainer clip holds the free end of many visors near the windshield. If the visor remains firm at the pivot but will not stay in its retainer, inspect the clip before ordering an entire assembly. Cracked brackets, missing screws, and stripped mounting points need separate attention because a new visor cannot compensate for an insecure roof attachment.
A Mirror or Electrical Problem
For a visor with a lighted mirror, confirm the mirror cover operates normally and check whether other interior lights function. A failed vanity light does not automatically mean the visor is defective. Diagnosis may require checking a fuse, lamp, switch, or wiring according to the manufacturer’s instructions.
2. Confirm Vehicle Compatibility With Care
Correct fit is the most important factor when purchasing a replacement sun visor. Two panels can look identical in online photographs but differ in mounting angle, rod diameter, electrical connector, or headliner clearance. An incorrect part may appear to attach properly yet fail to rotate or latch as intended.
Use the Vehicle Details and Part Number
Record the vehicle’s make, model, model year, trim level, and whether the part belongs on the driver or passenger side. If a parts catalog offers a vehicle identification number lookup, use it to narrow the options.
Look for a factory part number on the original assembly, its bracket, or the manufacturer parts listing. Compare that number with the replacement listing and verify superseded numbers through a trusted catalog. A matching exterior color alone is not reliable proof of compatibility.
Driver Side and Passenger Side Differences
The two sides are not always interchangeable. Their arms may rotate in opposite directions, warning labels can differ, and mirrors or wiring may appear only on one side. Vehicles with a left side steering wheel may also use different parts from versions built for right side steering, depending on design and market.
Check the Mounting and Electrical Details
Before placing an order, verify the screw or clip pattern, pivot style, retainer position, electrical connector shape, mirror illumination, extension mechanism, and interior color code. Check the returns policy, particularly for special order electrical parts.
Measure Only as a Secondary Check
A visor of the correct size may still contact the mirror, interfere with a headliner feature, or sit incorrectly when swung toward the side window. Fitment evidence is more valuable than a description that merely says universal.
3. Choose the Right Type of Replacement Sun Visor
Buyers generally encounter genuine manufacturer parts, aftermarket assemblies, and used original components. Choosing a replacement sun visor depends on compatibility, condition, features, availability, and the value of the vehicle.
Genuine Manufacturer Parts
Original equipment parts are designed for specific vehicle applications and generally offer the clearest route to matching factory appearance and features when ordered by the correct number. They may be attractive for vehicles with specialized mirrors, electronic functions, or distinctive trim colors.
Aftermarket Replacements
Aftermarket visors may offer a practical option when the manufacturer part is unavailable or costly. Look beyond broad claims such as fits most vehicles. Confirm that the seller identifies exact applications, provides mounting details, and specifies whether original mirror lights and other features remain supported.
Used Original Visors
Used parts can be useful for older vehicles with discontinued interior components. Inspect the pivot for excessive play, check for fabric staining, examine the vanity mirror, and make sure the mounting points are intact. Ask whether the visor came from a vehicle with deployed airbags or interior damage. A used unit should not be installed if its structure or safety related components are questionable.
Materials, Color, and Cabin Finish
Sun visor coverings may use woven fabric, vinyl, or other interior trim materials. Match the original headliner color under natural light when possible, since photographs can distort shades of gray, beige, and black.
4. Understand Replacement Costs and Overall Value
There is no dependable universal price for a replacement sun visor. A basic manual panel for a common vehicle can cost much less than an assembly incorporating a powered mirror or other integrated electronics.
What Determines the Total Expense?
Consider the price of the visor itself, any required retainer or mounting hardware, delivery charges, and potential labor. A technician may need additional time if hidden connectors must be accessed or damaged roof mounting points repaired.
A low priced replacement sun visor is not good value if it lacks the necessary hardware, matches the wrong side, or must be returned at your expense. Conversely, a complete visor assembly may be unnecessary when a separate inexpensive clip solves the problem. Compare the cost of the smallest safe repair with a correctly specified full replacement.
When to Spend More
Paying more can be reasonable when the replacement sun visor contains integrated electrical equipment, a precise trim color is important, or a manufacturer part offers a clearer fitment match. Prioritize safe attachment and reliable operation ahead of cosmetic upgrades. Decorative accessories should not obscure the windshield or cover required airbag warnings.
5. Prepare for a Safe Installation
Some sun visor replacements are straightforward for owners comfortable with interior trim work. Others are best performed by a qualified technician, particularly when the visor is close to curtain airbags or its wiring disappears behind tightly fitted roof trim. Always use instructions written for the exact vehicle.
Gather the Appropriate Tools
Installing a replacement sun visor may involve a correctly sized screwdriver or driver bit, a plastic trim removal tool, a clean cloth to protect cabin surfaces, and a small container for hardware. Select tools based on the fastener actually installed rather than forcing a close substitute.
Position the seats to give yourself room and protect the dashboard from dropped hardware.
Understand Electrical and Airbag Precautions
Roof mounted curtain airbags can be near the visor assembly in some vehicles. Disconnecting the battery is not a universal substitute for manufacturer airbag procedures. If the service manual requires electrical isolation or a specified waiting period, follow those instructions exactly. Never pull on unidentified connectors or remove airbag trim just to gain access to a visor mounting screw.
Some vehicle manufacturers explicitly require replacement of damaged visor brackets or assemblies because their condition may affect nearby safety systems.
Preserve Safety Warning Labels
On vehicles subject to airbag warning label requirements, the replacement visor must carry the appropriate warning information. In the United States, Federal Motor Vehicle Safety Standard No. 208 addresses sun visor airbag warnings. Avoid covering, removing, or altering these labels for appearance alone, and confirm market specific requirements when purchasing imported parts.
6. Install the New Sun Visor Step by Step
The following sequence describes a common screw mounted design. It is an overview rather than a universal repair procedure.
Step 1. Examine the Existing Mount
Park safely, switch off the ignition, and consult the relevant service procedure. Lower the visor and release its loose end from the retaining clip. Observe how the mounting cover is secured and identify the fasteners without pulling on the headliner.
Step 2. Remove the Cover Carefully
If a removable trim cap conceals screws, use the specified release method and a nonmarking trim tool. Apply only the pressure needed to disengage the cover. A cracked cap can make an otherwise good installation look unfinished and may prevent secure reassembly.
Step 3. Support the Visor and Release Its Fasteners
Hold the visor while loosening its mounting screws or clips.
Step 4. Disconnect the Mirror Wiring If Equipped
Follow the vehicle procedure for accessing and disconnecting the electrical connector. Grip the connector housing rather than pulling the wires. Do not stretch the harness to create extra working room, and do not cut wiring to remove a visor. If a connector is hidden or difficult to release, professional help is safer than forcing it.
Step 5. Compare the Old and New Assemblies
Set both parts on a clean surface and check the arm, mounting base, retainer engagement, mirror position, color, and connector.
Step 6. Install and Secure the Replacement
Reconnect any approved electrical connector, position the visor, and install the original or specified new fasteners. Tighten them to the vehicle manufacturer’s instructions. Excessive force can strip threads or crack plastic brackets, while loose fasteners allow unwanted movement. Refit trim caps only after the main assembly is secure.
Step 7. Test Every Function Before Driving
Raise and lower the visor, swing it toward the side window, and engage the retaining clip several times. Confirm that it stays in position, does not obstruct normal mirror use, and does not snag the headliner. Check vanity mirror lighting or electronic features if equipped, then verify that no warning indicator or unexpected electrical behavior appears.
A replacement sun visor should move smoothly without dropping unexpectedly. If it rattles, sits crooked, or pulls away from its mounting base, do not rely on it until the attachment has been checked.
7. Maintain the Visor and Prevent Repeat Damage
Move the replacement sun visor by its reinforced edge rather than pulling on a mirror cover or decorative pocket. Avoid using the panel to support heavy accessories, and never force the arm past its designed range of travel.
Keep Hinges and Upholstery in Good Condition
Dust and grime collect around the pivot and mirror frame. Wipe accessible surfaces with a soft cloth and a cleaning product suitable for the interior material. Avoid soaking the fabric or spraying liquid directly into switches and illuminated mirror assemblies.
If the pivot feels unusually stiff, do not automatically apply oil or grease. Some mechanisms use friction surfaces that can be damaged by unsuitable lubricants. Consult product instructions before applying anything to the hinge.
Respond Early to Small Problems
A loose screw or cracked support clip can place extra stress on the main pivot. Investigate changes in movement before they become major failures.
Common Buying and Installation Mistakes to Avoid
Compatibility is specific, and seemingly minor differences can matter when a component is mounted close to the windshield and roof.
Ordering only by model year: A model year may include different trim levels or production changes. Confirm the part number and all relevant features.
Ignoring the correct side: Driver and passenger assemblies may have different angles, labels, and wiring arrangements. Check the specified side before paying.
Choosing color from a single photograph: Cabin colors vary under lighting. Request the interior trim code or additional photographs if appearance matters.
Assuming every sagging panel needs full replacement: Check the mounting bracket and retaining clip first. Replacing a sound visor does not repair loose roof hardware.
Forcing electrical connections: A similar looking plug may have a different design. Never splice or modify wiring without approved instructions.
Covering safety labels: A tidy interior is not a reason to conceal required airbag information. Buy a part appropriate for the vehicle and its market.
Skipping the final movement test: A visor that looks aligned can still swing into an unwanted position.
When Professional Replacement Is the Better Choice
A skilled automotive trim technician or qualified repair shop is the sensible option if a fastener is stripped, a roof mount is damaged, the visor contains complicated electronics, or the work requires disturbing airbag related trim.
Before authorizing work, explain the symptom and ask whether the estimate includes the component, any clips, electrical checks, and labor. After the repair, perform the same movement and lighting tests you would use following a careful home installation.
Frequently Asked Questions
How do I know which replacement sun visor fits my car?
Check your vehicle identification number, factory part number, mounting type, driver or passenger position, trim color, and electrical features against a reliable parts catalog.
Can I install a replacement sun visor myself?
Often yes, if the vehicle has accessible mounting hardware and a straightforward procedure. Follow the specific service manual and seek help when airbags or hidden wiring are involved.
Why does my car sun visor keep falling down?
Worn pivot friction, damaged hinges, or loose mounting hardware are common causes. Inspect the roof bracket first, then replace the visor if its internal mechanism has failed.
Are universal sun visors suitable for every vehicle?
No. Similar panel sizes do not guarantee compatible mounting points, safe movement, suitable mirror positions, or matching electrical connections.
Is a used replacement sun visor a good option?
It can be for an older model if the part is compatible and free from cracks, loose pivots, mirror damage, and questionable accident related wear.
Does replacing a sun visor affect the airbags?
It should not when the correct part and manufacturer procedure are used, but some mounts are near curtain airbags. Stop if the work requires disturbing airbag components.
Conclusion
Choosing the right replacement sun visor begins with an accurate diagnosis and a confirmed match for the vehicle, not a quick visual comparison. Prioritize secure mounting, correct electrical connections, intact warning labels, and dependable movement over cosmetic details or the lowest advertised price. Whether you install the part yourself or use a professional, careful preparation and a complete function test help deliver a reliable result. A properly fitted visor restores practical sun protection and makes everyday driving more comfortable.
